Shank in Volleyball: Discussing Causes & Crafting Solutions

In volleyball, a term that might not be well-known to beginners is ‘shank.’
It is a piece of volleyball jargon, yet it describes a common and challenging situation on the court.

It can change the game’s flow, turning a good play into a quick rush to get the ball back under control.
Quick Answer: A shank in volleyball occurs when a player mishandles the ball during serve receive, or dig. The ball deflects off the receiver uncontrollably, often going out of play or away from teammates.
In this guide, I will be elaborating on the causes of the shank and its impact on the game.
Along with it, my focus would be to share simple tips and exercises to help players better handle the ball and stop shanks from happening.
Understanding the Basics of Shank in Volleyball
In volleyball, mastering various techniques and strategies is essential for success.
But, sometimes, even experienced players encounter a situation known as a ‘shank.’
This term describes an error in which a player unintentionally sends the ball in the wrong direction during a play.
It means that rather than the ball heading towards a teammate for a return, it goes uncontrollably too far from them or out of bounds.
Understanding what a shank is, why it happens, and its impact on the game is crucial for players at all levels.
Causes of a Shank
There are a lot of factors that cause the shank to happen, mostly of poor techniques used by the players.
Let me discuss three of the most common factors:
1) Poor Technique and Positioning
The most fundamental cause of shanks is improper technique and positioning.
It happens when players do not align their bodies correctly with the ball’s trajectory or fail to execute the correct stance.
For example, misjudging the angle for the dig or uncontrolled pancake can send the ball off in an unintended direction.
2) Serve and Hit Complexity
Shanks often happen when players face complex serves or spikes.
When your opponent strategically places the tip or does a high-speed serve, it can lead to losing control over the ball and making it difficult for you to pass it to your teammate.
To handle these complex plays and prevent shanks, you need to practice specific drills that I will explain later in this guide.

3) External Factors
Factors outside a player’s immediate control, like lighting, crowd noise, or floor conditions, can also lead to shanks.
These elements can distract players or affect their timing and coordination, resulting in misjudged plays.
For example, in a nighttime volleyball match with dim lighting, players may find it difficult to see the ball.
This reduced visibility can increase the likelihood of shanks occurring during the game.
Impact of Shank on the Game
The effect of a shank in volleyball can be far-reaching:
Tips to Avoid Shanking in Volleyball
The shank in volleyball can be a frustrating experience for the player who struggles to handle the ball correctly.
However, if you follow the best techniques and practices, it is possible to reduce the chances of making this error.
Let me discuss some practical tips to help players avoid shanking in volleyball.
1) Establishing a Stable Platform
Creating a stable platform is fundamental to avoiding shanks and double hits.
The players need to ensure that their arms are straight and elbows locked.
Also, they should press their hands firmly, creating a flat surface with their forearms.
They need to angle this stable platform correctly toward the intended target.
Such a position enables the players to receive the ball more effectively and send it smoothly to their teammates.
2) Mastering Ball Tracking and Focus
I can’t emphasize enough that you should always watch the ball closely during the play.
A player must practice tracking the ball from the moment it leaves the server’s or hitter’s hand.
This eagle eye focus will help anticipate the ball’s trajectory and speed.
It also allows for timely adjustments in positioning and technique.
Mastering ball tracking ensures that players are always ready to make a controlled play, reducing the likelihood of shanks.

3) Optimizing Arm Movements and Position
The way any volleyball player uses their arms can significantly influence their control over the ball.
Players should avoid swinging their arms wildly.
Instead, they should use minimal, precise movements to guide the ball.
Maintaining a proper arm position aligned with the body’s center and the ball’s path will help you make accurate passes and digs.
4) Adopting the Correct Stance and Posture
As a coach, this is one of the initial lessons I give newbies.
Your stance and posture are super critical in handling the ball effectively.
Practicing an athletic stance with knees slightly bent and weight on the balls of the feel will allow you for quick, agile movements.
Additionally, this posture will enable you to quickly adjust to the ball’s direction, helping you to reduce the risk of shanks.
5) Effective Footwork and Lateral Movement
Good footwork helps players get to the ball in the best way to play it.
The players need to practice moving side to side quickly with small steps, keeping on their toes.
This quickness lets them cover more of the court and get to the ball faster.
Moving well from side to side means players can get into the right spot to hit the ball, which helps lower the chance of making a shank.
If you’re a libero, picking shoes designed for your role can also improve your footwork and side-to-side movements on the court.

Effective Drills to Minimize Shanking in Volleyball
As a coach, you must engage the players in specific drills to minimize shanks and maintain a solid defensive game.
These drills improve technique, reaction time, and overall ball-handling skills.
Let me explain the step-by-step procedure of three practical drills you should incorporate into your players’ training sessions.
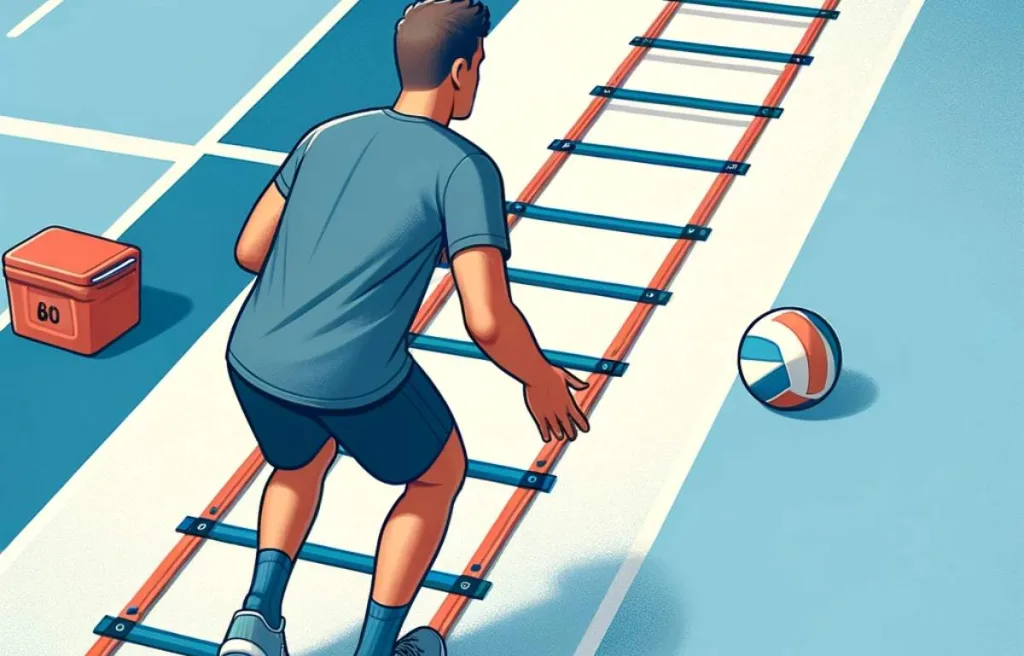
1) Passing Ladder Drill
The Passing Ladder Drill is excellent for developing quick footwork and precise ball control.
Its steps are listed below:
- Lay a ladder flat on the court. If you don’t have a ladder, use tape or cones to create a similar pattern.
- Stand at one end of the ladder. It would be your starting position.
- Begin by passing the ball to a partner or against a wall.
- After each pass, move laterally to the next space in the ladder.
- Keep your platform stable and direct the ball accurately as you move.
- Continue moving along the ladder, focusing on precise movements and accurate passes.
- After reaching the end, return in the opposite direction and continue with your passes and lateral movements.

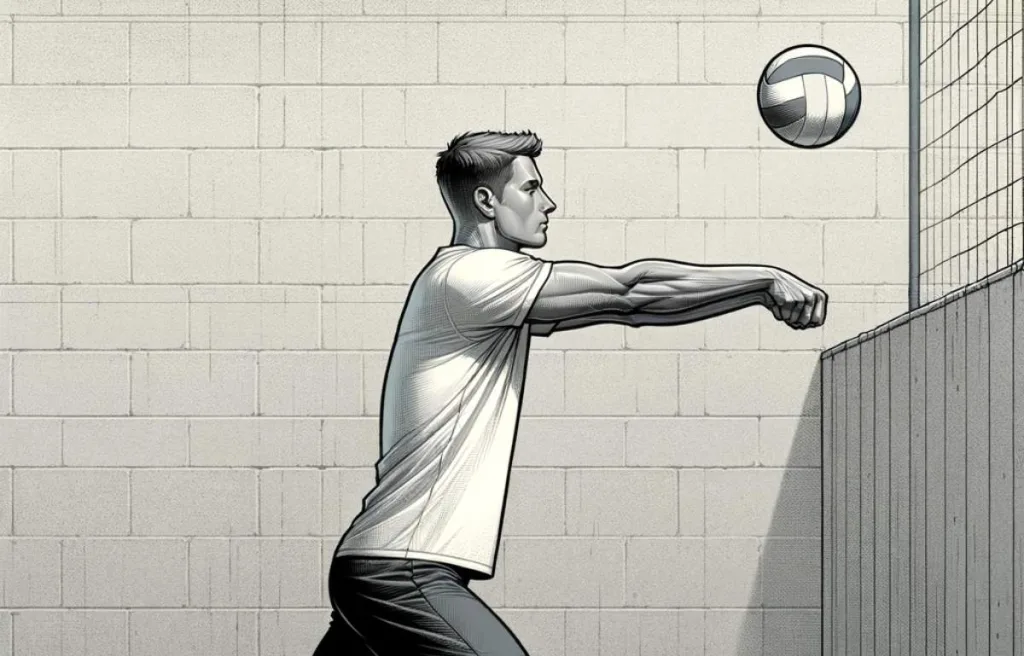
2) Wall Passing Drill
The Wall Passing Drill enhances a player’s ability to control the ball and improve their passing accuracy.
You can follow the step-by-step procedure to execute it effectively.
- Choose a solid wall with enough space for the drill.
- Stand about an arm’s length away from the wall.
- Gently pass the ball to the wall, aiming for a specific spot.
- Keep your arms straight and your platform stable.
- Focus on controlling the ball as it rebounds from the wall.
- Adjust your platform as needed to keep the ball in control.
- Aim for consistent passes, both in terms of force and accuracy.
- Repeat this action to build muscle memory.

3) Butterfly Drill
The butterfly is an interesting drill that helps a player improve movement, communication, and passing.
It consists of straightforward steps listed below:
- Start by having players line up in two groups. These lines should face each other across the volleyball court.
- The first player in one line begins by passing the volleyball to someone in the opposite line.
- After passing the ball, this player follows where it went, moving to join the back of the line they just passed to.
- The player in the second line who received the ball now passes it back to the first line.
- Then, just like the first player, they follow their pass to the end of the first line.
- The players repeat this process of passing the ball and following their pass, creating a continuous movement pattern.
As the drill goes on, the movement of players from one line to the other looks like the fluttering of a butterfly’s wings, which is why it’s called the Butterfly Drill.
Conclusion
To wrap up, shanking in volleyball can hand your opponents easy points and damage your team’s momentum.
Focusing on the tips I shared earlier, such as creating a stable platform and improving your footwork, is essential to avoid this costly error.
Among the drills we explored, the Passing Ladder Drill is the most effective for minimizing shanks, alongside the other valuable drills mentioned.
By consistently practicing these drills and applying the tips outlined, you’ll equip yourself better to handle it.
This effort will transform your volleyball experience, leading to more enjoyable games and greater success on the court.
